PostgreSQL 11 Streaming Replication/Hot Standby


elephant
Photo by shy sol on Pexels.com

To create PostgreSQL replication first we must install PostgreSQL on  Primary and  Standby server.

On Primary and Standby:

[root@localhost ]# yum -y install epel-release
[root@localhost ]# yum -y install bash-completion
[root@localhost ]# yum -y install https://download.postgresql.org/pub/repos/yum/11/redhat/rhel-7-x86_64/pgdg-centos11-11-2.noarch.rpm
[root@localhost ]# yum install postgresql11-server
[root@localhost ]# yum install postgresql11-contrib

On Primary:

[root@localhost ]# /usr/pgsql-11/bin/postgresql-11-setup initdb
Initializing database ... OK

[root@localhost ]# systemctl enable postgresql-11.service
[root@localhost ]# systemctl start postgresql-11.service

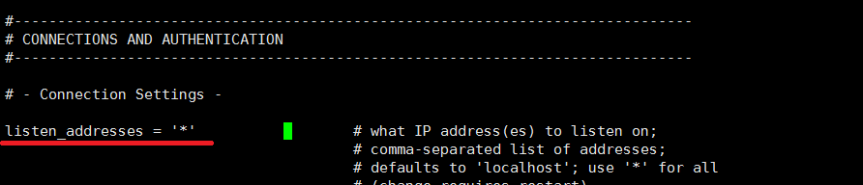
The combination of Hot Standby and Standby Replication would make the latest data inserted into the primary visible in the standby almost immediately. Now lets change postgresql.conf on Primary to create hot standby with streaming replication:

[root@localhost ]# vi /var/lib/pgsql/11/data/postgresql.conf

wal_level = replica
max_wal_senders=10
wal_keep_segments=256
archive_mode=on
archive_command=’/usr/pgsql-11/bin/syncwal.sh %p %f'
listen_addresses = '*'

Create bash script which will copy WAL files from primary to standby:

[root@localhost ]# vi /usr/pgsql-11/bin/syncwal.sh
#!/bin/bash
scp $1 192.168.2.129:/var/lib/pgsql/11/walarchive/$2
if [ $? != 0 ]
then
echo "Archiver error:"
exit 1
fi
exit 0
[root@localhost ~]# chown postgres: /usr/pgsql-11/bin/syncwal.sh
[root@localhost ~]# chmod 700 /usr/pgsql-11/bin/syncwal.sh

Now we will create a special user for replication and revoke REPLICATION grant from “postgres” superuser to secure our replication.

[root@localhost bin]# su - postgres 
-bash-4.2$
psql postgres=# CREATE ROLE replicauser WITH REPLICATION LOGIN ENCRYPTED PASSWORD 'test';
CREATE ROLE 
postgres=# ALTER ROLE postgres NOREPLICATION;
ALTER ROLE

Then edit pg_hba.conf  file on the primary server and add a line below to give access to walreceiver from the standby :

[root@localhost bin]# vi /var/lib/pgsql/11/data/pg_hba.conf
host     replication         replicauser          192.168.2.129/32        md5

after change restart the PostgreSQL:

[root@localhost ~]# systemctl restart postgresql-11.service
[root@localhost ~]# systemctl stop firewalld.service
[root@localhost ~]# systemctl disable firewalld.service

Disable or set to permissive mode SELinux

On standby:

[root@localhost ~]# mkdir -m 700 /var/lib/pgsql/11/walarchive
[root@localhost 11]# chown postgres: /var/lib/pgsql/11/walarchive

On each host generate ssh key  from Postgres user and add this key to other hosts authorized_keys file:

-bash-4.2$ ssh-keygen -t rsa
-bash-4.2$ touch ~/.ssh/authorized_keys
-bash-4.2$ chmod 600 ~/.ssh/authorized_keys

Import base backup of the primary to the standby database

-bash-4.2$ /usr/pgsql-11/bin/pg_basebackup -D /var/lib/pgsql/11/data/ -c fast -X fetch -P -Fp -R -h 192.168.2.113 -p 5432 -U replicauser
Password: ****
40952/40952 kB (100%), 1/1 tablespace

Change standby config file like below:

-bash-4.2$ vi /var/lib/pgsql/11/data/postgresql.conf
hot_standby = on
hot_standby_feedback=on

Then edit recovery.conf file and add lines below:

-bash-4.2$ vi /var/lib/pgsql/11/data/recovery.conf
standby_mode = 'on'
primary_conninfo = 'user=replicauser password=test host=192.168.2.113 port=5432 scram_channel_binding=''tls-unique'' sslmode=prefer sslcompression=0 krbsrvname=postgres target_session_attrs=any'
restore_command = 'cp /var/lib/pgsql/11/walarchive/%f %p'
archive_cleanup_command='/usr/pgsql-11/bin/pg_archivecleanup /var/lib/pgsql/11/walarchive %r'
trigger_file = '/var/lib/pgsql/11/data/finish.replication'
recovery_target_timeline = 'latest'

Start database and enable autostart:

[root@localhost 11]# systemctl start postgresql-11.service
[root@localhost 11]# systemctl enable postgresql-11.service

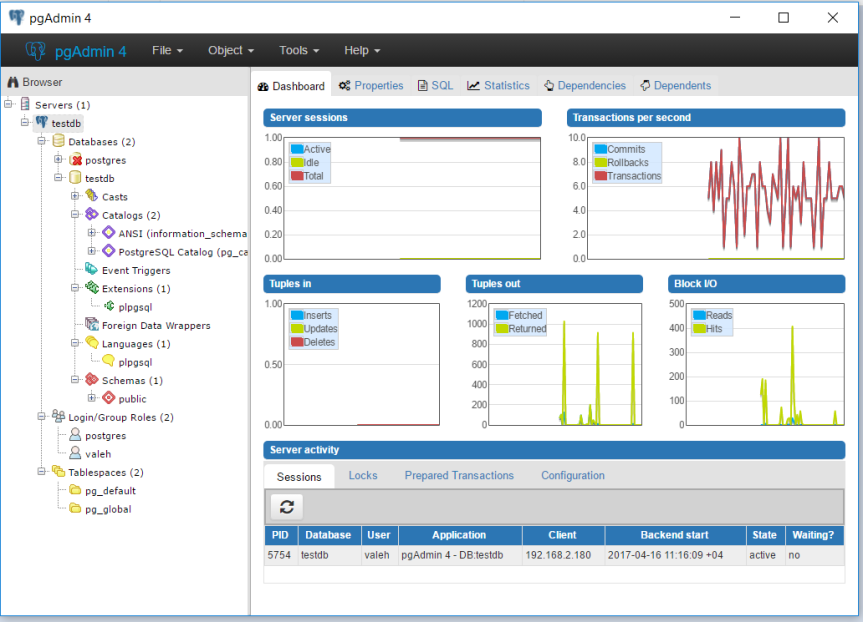
Now create new database and tables to test the standby database and you will see that they immediately applied on standby.


Step by step installation of PostgreSQL 9.4 on CentOS 7


 1200px-Postgresql_elephant.svg.png
First, we will install CentOS 7 on Virtualbox.
You can download iso image of CentOS 7 from https://www.centos.org/
Let’s create our virtual machine:l

1
2
3
4
5
6
Then go to the settings of new created virtual machine and change network and other settings like bellow:
7

Add Downloaded CentOS 7 disc image to cdrom
8

9

Start Virtual Machine and begin installation:

10

11
12

14
15

16
17

18
19
20
21

22
23
24
25
26
27
28
29

30

31.PNG

Install guest additions and reboot system:

32

Then edit /etc/hosts file and add IP address and hostname.

Check sshd service if it not works disable change SELinux config and the check again

[root@posgresql ~]# systemctl status sshd.service

Edit SELinux
Yo can  set permissive SELINUX or make PosgreSQL work if SELinux enabled
When you configure SELinux as permissive, it gives you a warning message instead of actually prohibiting the action. To change SELinux’s behavior to the permissive mode you need to edit the configuration file.

[root@posgresql ~] vi /etc/SELinux/config
SELINUX=permissive

[root@posgresql ~]# systemctl status sshd.service
● sshd.service - OpenSSH server daemon
 Loaded: loaded (/usr/lib/systemd/system/sshd.service; enabled; vendor preset: enabled)
 Active: active (running) since Sun 2017-04-16 07:14:14 +04; 5min ago
 Docs: man:sshd(8)
 man:sshd_config(5)
 Main PID: 966 (sshd)
 CGroup: /system.slice/sshd.service
 └─966 /usr/sbin/sshd -D

Apr 16 07:14:14 posgresql.localdomain systemd[1]: Starting OpenSSH server daemon...
Apr 16 07:14:14 posgresql.localdomain sshd[966]: Server listening on 0.0.0.0 port 22.
Apr 16 07:14:14 posgresql.localdomain sshd[966]: Server listening on :: port 22.
Apr 16 07:14:14 posgresql.localdomain systemd[1]: Started OpenSSH server daemon.
Apr 16 07:17:25 posgresql.localdomain sshd[9933]: Accepted password for root from 192.168.2.180 port 50904 ssh2


Run the following command to make PostgreSQL work if SELinux enabled on your system.

[root@posgresql ~] setsebool -P httpd_can_network_connect_db 1

You may not log in to PostegreSQL if you didn’t run the above command.

Then I run yum update

[root@posgresql ~]# yum update

Installing PosgreSQL 9.4s

Go to the PostgreSQL vet site and click download  https://www.postgresql.org
From downloads page click on Red Hat family Linux (including CentOS/Fedora/Scientific/Oracle variants), then scroll down and click on  repository RPM listing link
34

Scroll down and find version which we want and copy link address35

Then go to terminal and install package

[root@posgresql ~]# yum install https://download.postgresql.org/pub/repos/yum/9.4/redhat/rhel-7-x86_64/pgdg-centos94-9.4-3.noarch.rpm

[root@posgresql ~]# yum repolist
<<<OUTPUT TRIMMED>>>
pgdg94/7/x86_64 PostgreSQL 9.4 7 - x86_64 395
updates/7/x86_64 CentOS-7 - Updates 1,491
repolist: 11,560

[root@posgresql ~]# yum install postgresql94 postgresql94-contrib.x86_64
<<<OUTPUT TRIMMED>>>
Complete!
[root@posgresql ~]# rpm -qa | grep postgres
postgresql94-libs-9.4.11-2PGDG.rhel7.x86_64
postgresql94-contrib-9.4.11-2PGDG.rhel7.x86_64
postgresql94-server-9.4.11-2PGDG.rhel7.x86_64
postgresql94-9.4.11-2PGDG.rhel7.x86_64

Then we initialize cluster and start it

[root@posgresql ~]# /usr/pgsql-9.4/bin/postgresql94-setup initdb
Initializing database ... OK
[root@posgresql ~]# systemctl start postgresql-9.4.service

To enable PostgreSQL to start on boot:

[root@posgresql ~]# systemctl enable postgresql-9.4.service
Created symlink from /etc/systemd/system/multi-user.target.wants/postgresql-9.4.service to /usr/lib/systemd/system/postgresql-9.4.service.

36

Congratulations PostgreSQL installed and ready to use 🙂

How to start and stop Postgres:

[root@posgresql ~]# systemctl stop postgresql-9.4.service
[root@posgresql ~]# ps -ef | grep postgres
root 11235 9938 0 08:25 pts/0 00:00:00 grep --color=auto postgres

 
[root@posgresql ~]# systemctl start postgresql-9.4.service
[root@posgresql ~]# ps -ef | grep postgres
postgres 11253 1 0 08:26 ? 00:00:00 /usr/pgsql-9.4/bin/postgres -D /var/lib/pgsql/9.4/data
postgres 11254 11253 0 08:26 ? 00:00:00 postgres: logger process 
postgres 11256 11253 0 08:26 ? 00:00:00 postgres: checkpointer process 
postgres 11257 11253 0 08:26 ? 00:00:00 postgres: writer process 
postgres 11258 11253 0 08:26 ? 00:00:00 postgres: wal writer process 
postgres 11259 11253 0 08:26 ? 00:00:00 postgres: autovacuum launcher process 
postgres 11260 11253 0 08:26 ? 00:00:00 postgres: stats collector process 
root 11265 9938 0 08:26 pts/0 00:00:00 grep --color=auto postgres

To be able to connect you must open port 5432 in firewall:

 [root@posgresql ~]# systemctl status firewalld.service
● firewalld.service - firewalld - dynamic firewall daemon
 Loaded: loaded (/usr/lib/systemd/system/firewalld.service; enabled; vendor preset: enabled)
 Active: active (running) since Sun 2017-04-16 07:14:08 +04; 1h 25min ago
 Docs: man:firewalld(1)
 Main PID: 576 (firewalld)
 CGroup: /system.slice/firewalld.service
 └─576 /usr/bin/python -Es /usr/sbin/firewalld --nofork --nopid

Apr 16 07:14:07 posgresql.localdomain systemd[1]: Starting firewalld - dynamic firewall daemon...
Apr 16 07:14:08 posgresql.localdomain systemd[1]: Started firewalld - dynamic firewall daemon.


[root@posgresql ~]# firewall-cmd --state
running

[root@posgresql ~]# firewall-cmd --list-all
public (active)
 target: default
 icmp-block-inversion: no
 interfaces: enp0s3
 sources: 
 services: dhcpv6-client ssh
 ports: 
 protocols: 
 masquerade: no
 forward-ports: 
 sourceports: 
 icmp-blocks: 
 rich rules: 

[root@posgresql ~]# firewall-cmd --permanent --add-port=5432/tcp
success
[root@posgresql ~]# systemctl restart firewalld.service

[root@posgresql ~]# firewall-cmd --list-all
public (active)
 target: default
 icmp-block-inversion: no
 interfaces: enp0s3
 sources: 
 services: dhcpv6-client ssh
 ports: 5432/tcp
 protocols: 
 masquerade: no
 forward-ports: 
 sourceports: 
 icmp-blocks: 
 rich rules:


Now let’s do some tests on our new installed PostgreSQL

[root@posgresql ~]# su - postgres
-bash-4.2$ which psql
/bin/psql
-bash-4.2$ psql
psql (9.4.11)
Type "help" for help.

postgres=# 
postgres=# create user valeh with password 'test';
CREATE ROLE
postgres=# create database testdb owner valeh;
CREATE DATABASE

postgres-# \quit
-bash-4.2$ exit
logout


By default, PostgreSQL is operating through a socket on the localhost. In that configuration, the installation is secured against remote threats. If you do not need to access the database from a remote host, you can leave the default configuration.

To configure access to database from a remote host we must edit some files.
First, we will tell PostgreSQL to start listening on our network interfaces:

 vi /var/lib/pgsql/9.4/data/postgresql.conf

41

uncomment and change it like bellow:

42

By default, PostgreSQL does not allow password authentication. We will change that by editing its host-based authentication (HBA) configuration:

[root@posgresql ~]# vi /var/lib/pgsql/9.4/data/pg_hba.conf

39

Then replace “ident” with “md5” and line with our clients IP address :
43

Restart PostgreSQL and verify that we are now listening on port 5432:

[root@posgresql ~]# systemctl restart postgresql-9.4.service

[root@posgresql ~]# ss -l -n |grep 5432
u_str LISTEN 0 128 /var/run/postgresql/.s.PGSQL.5432 35417 * 0 
u_str LISTEN 0 128 /tmp/.s.PGSQL.5432 35419 * 0 
tcp LISTEN 0 128 *:5432 *:* 
tcp LISTEN 0 128 :::5432 :::*

To connect to database from your host download PgAdmin, install and connect:44

45

Now we connected to our remote database:

46

Oracle 12.1.0.2 silent install and de-install


After Oracle Enterprise Linux setup we must set up some settings shown bellow:

Edit “/etc/hosts” file and add fully qualified name of your server.

[root@agcns Desktop]# vi /etc/hosts
127.0.0.1      localhost localhost.localdomain 
192.168.8.157  agcns agcns.localdomain

Then install oracle-rdbms-server-12cR1-preinstall package to perform all your prerequisite setup

[root@agcns Desktop]# yum install oracle-rdbms-server-12cR1-preinstall -y

Add lines bellow to the /etc/security/limits.conf  file.

oracle   soft   nofile    1024
oracle   hard   nofile    65536
oracle   soft   nproc    16384
oracle   hard   nproc    16384
oracle   soft   stack    10240
oracle   hard   stack    32768

Install  packages bellow if they are not already installed.

yum install binutils -y
yum install compat-libcap1 -y
yum install compat-libstdc++-33 -y
yum install compat-libstdc++-33.i686 -y
yum install gcc -y
yum install gcc-c++ -y
yum install glibc -y
yum install glibc.i686 -y
yum install glibc-devel -y
yum install glibc-devel.i686 -y
yum install ksh -y
yum install libgcc -y
yum install libgcc.i686 -y
yum install libstdc++ -y
yum install libstdc++.i686 -y
yum install libstdc++-devel -y
yum install libstdc++-devel.i686 -y
yum install libaio -y
yum install libaio.i686 -y
yum install libaio-devel -y
yum install libaio-devel.i686 -y
yum install libXext -y
yum install libXext.i686 -y
yum install libXtst -y
yum install libXtst.i686 -y
yum install libX11 -y
yum install libX11.i686 -y
yum install libXau -y
yum install libXau.i686 -y
yum install libxcb -y
yum install libxcb.i686 -y
yum install libXi -y
yum install libXi.i686 -y
yum install make -y
yum install sysstat -y
yum install unixODBC -y
yum install unixODBC-devel -y

Set the password for the oracle user.

[root@agcns Desktop]# passwd oracle
Changing password for user oracle.
New password: 
Retype new password: 
passwd: all authentication tokens updated successfully.

change   /etc/security/limits.d/90-nproc.conf  like below.

*     -   nproc 16384
root soft nproc unlimited

Set  SELINUX to permissive, disable firewall and then reboot server:

[root@agcns]# vi /etc/selinux/config
SELINUX=permissive
[root@agcns]# service iptables stop
[root@agcns]# chkconfig iptables off
[root@agcns]# reboot

Create the ORACLE_HOME directory in which the Oracle software will be installed.

[root@agcns ~]# mkdir -p /u01/app/oracle/product/12.1.0.2/db_1
[root@agcns ~]# chown -R oracle:oinstall /u01
[root@agcns ~]# chmod -R 775 /u01

Switch to oracle account and unzip Oracle Installation zip files:

[oracle@agcns]$ unzip linuxamd64_12c_database_1of2.zip
[oracle@agcns]$ unzip linuxamd64_12c_database_2of2.zip

Edit bash_profile and add lines  bellow to this file:

[oracle@agcns]$ vi /home/oracle/.bash_profile
export PATH
export TMP=/tmp
export TMPDIR=$TMP
export ORACLE_HOSTNAME=agcns.localdomain
export ORACLE_UNQNAME=gcdb
export ORACLE_BASE=/u01/app/oracle
export ORACLE_HOME=$ORACLE_BASE/product/12.1.0.2/db_1
export ORACLE_SID=gcdb
export PATH=/usr/sbin:$PATH
export PATH=$ORACLE_HOME/bin:$PATH
export LD_LIBRARY_PATH=$ORACLE_HOME/lib:/lib:/usr/lib export CLASSPATH=$ORACLE_HOME/jlib:$ORACLE_HOME/rdbms/jlib

To perform silent installation  we must create and  use oraInst.loc and response file.

[root@agcns ~]# vi /etc/oraInst.loc
inventory_loc=/u01/app/oraInventory
inst_group=oinstall

[root@agcns ~]# chown oracle:oinstall /etc/oraInst.loc 
[root@agcns ~]# chmod 664 /etc/oraInst.loc

[oracle@agcns database]$ ./runInstaller -silent \
> -responseFile /tmp/database/response/db_install.rsp \
> oracle.install.option=INSTALL_DB_SWONLY \
> UNIX_GROUP_NAME=oinstall \
> INVENTORY_LOCATION=/u01/app/oracle/oraInventory \
> SELECTED_LANGUAGES=en \
> ORACLE_HOME=/u01/app/oracle/product/12.1.0.2/db_1 \
> ORACLE_BASE=/u01/app/oracle \
> oracle.install.db.InstallEdition=EE \
> oracle.install.db.isCustomInstall=false \
> oracle.install.db.DBA_GROUP=dba \
> oracle.install.db.OPER_GROUP=dba \
> oracle.install.db.BACKUPDBA_GROUP=dba \
> oracle.install.db.DGDBA_GROUP=dba \
> oracle.install.db.KMDBA_GROUP=dba \
> SECURITY_UPDATES_VIA_MYORACLESUPPORT=false \
> DECLINE_SECURITY_UPDATES=true
Starting Oracle Universal Installer...

Checking Temp space: must be greater than 500 MB. Actual 18421 MB Passed
Checking swap space: must be greater than 150 MB. Actual 3919 MB Passed
Preparing to launch Oracle Universal Installer from /tmp/OraInstall2016-09-07_08-06-29PM. Please wait ...[oracle@agcns database]$ 
[oracle@agcns database]$ 
[oracle@agcns database]$ You can find the log of this install session at:
 /u01/app/oracle/oraInventory/logs/installActions2016-09-07_08-06-29PM.log
The installation of Oracle Database 12c was successful.
Please check '/u01/app/oracle/oraInventory/logs/silentInstall2016-09-07_08-06-29PM.log' for more details.

As a root user, execute the following script(s):
 1. /u01/app/oracle/product/12.1.0.2/db_1/root.sh


Successfully Setup Software.


[oracle@agcns logs]$ su -
Password: 
[root@agcns ~]# /u01/app/oracle/product/12.1.0.2/db_1/root.sh
Check /u01/app/oracle/product/12.1.0.2/db_1/install/root_agcns.localdomain_2016-09-07_20-12-10.log for the output of root script
[root@agcns ~]# cat /u01/app/oracle/product/12.1.0.2/db_1/install/root_agcns.localdomain_2016-09-07_20-12-10.log 
Performing root user operation for Oracle 12c 

The following environment variables are set as:
 ORACLE_OWNER= oracle
 ORACLE_HOME= /u01/app/oracle/product/12.1.0.2/db_1
 Copying dbhome to /usr/local/bin ...
 Copying oraenv to /usr/local/bin ...
 Copying coraenv to /usr/local/bin ...


Creating /etc/oratab file...
Entries will be added to the /etc/oratab file as needed by
Database Configuration Assistant when a database is created
Finished running generic part of root script.
Now product-specific root actions will be performed.
[root@agcns ~]# 


[oracle@agcns ~]$ sqlplus / as sysdba

SQL*Plus: Release 12.1.0.1.0 Production on Wed Sep 7 20:14:43 2016

Copyright (c) 1982, 2013, Oracle. All rights reserved.

Connected to an idle instance.

SQL> 


De-Installing Oracle Database

To remove installed oracle software, you must run the de-install utility by invoking the runInstaller with the deinstall keyword:.

[oracle@agcns database]$ ./runInstaller -deinstall -home /u01/app/oracle/product/12.1.0.2/db_1/
Checking for required space in /tmp directory ...
Please wait ...
./runInstaller: line 167: [: 61%: integer expression expected
Space check on /tmp directory passed...
Bootstrapping the deinstall components...Done
Location of logs /tmp/deinstall_bootstrap/logs/
                      <<<<< OUTPUT TRIMMED >>>>>>
####################### CLEAN OPERATION SUMMARY #######################
Cleaning the config for CCR
As CCR is not configured, so skipping the cleaning of CCR configuration
CCR clean is finished
Successfully deleted directory '/u01/app/oracle/product/12.1.0.2/db_1' on the local node.
Successfully deleted directory '/u01/app/oraInventory' on the local node.
Oracle Universal Installer cleanup was successful.


Run 'rm -rf /etc/oraInst.loc' as root on node(s) 'agcns' at the end of the session.

Run 'rm -rf /opt/ORCLfmap' as root on node(s) 'agcns' at the end of the session.
Run 'rm -rf /etc/oratab' as root on node(s) 'agcns' at the end of the session.
Oracle deinstall tool successfully cleaned up temporary directories.
#######################################################################

[oracle@agcns database]$ su -
Password: 
[root@agcns ~]# rm -rf /opt/ORCLfmap
[root@agcns ~]# rm -rf /etc/oratab
[root@agcns ~]# rm -rf /etc/oraInst.loc


Oracle Database 11g Release 2-nin Oracle Linux R6 əməliyyat sisteminə yazılması


oracle-11gimages (1)İlk olaraq biz Oracle Linux Release 6 Update 4 Media Pack x86_64 (64bit) faylını https://edelivery.oracle.com/linux saytından yükəyirik

Daha sonra yüklədiyimiz faylı quraşdıracağımız virtual maşını yaradırıq.Virtual HDD 20Gb RAM isə 4048 seçirik.

-2-1

Virtual maşına Linux diskini mount edib start edirik, açılan pəncərədən install and updgrade existing system seçib enter vururuq

1Daha sonra skip seçirik

2

Növbəti pəncərələrdə Next düyməsini sıxaraq uyğun seçimləri edərək və məlumaları yazaraq davam edirik

3

4

Aşağıdakı pəncərdən göstərilmiş göstərilmiş paket qrupları və onlardan uyğun  paketlər seçilir və next düyməsi vurulur

  • Base System > Base
  • Base System > Client management tools
  • Base System > Compatibility libraries
  • Base System > Hardware monitoring utilities
  • Base System > Large Systems Performance
  • Base System > Network file system client
  • Base System > Performance Tools
  • Base System > Perl Support
  • Servers > Server Platform
  • Servers > System administration tools
  • Desktops > Desktop
  • Desktops > Desktop Platform
  • Desktops > Fonts
  • Desktops > General Purpose Desktop
  • Desktops > Graphical Administration Tools
  • Desktops > Input Methods
  • Desktops > X Window System
  • Development > Additional Development
  • Development > Development Tools
  • Applications > Internet Browser

5

Quraşdırma bittdi və artıq sistemə daxil ola bilərik7

Oracle quraşdırılması

Əməliyyat sistemi hazır olduqdan sonra Oacle.com saytından Oracle 11gR2-ni 2 ayrı zip fayl şəklində yükləyirik, daha sonra onları extract edib birləşdiririk və serverdə bir papkaya atırıq. Oracle Database quraşdırlmamışdan oncə sistemə olan ilkin tələbləri sazlamalıyıq.

İlkin tələblərin quraşdırılmasını iki cür etmək olar:

  • Avtomatik əgər “oracle-rdbms-server-11gR2-preinstall” paketimiz varsa
  • Özümüz manual olaraq.

Bu məqalədə  hər şeyi manual edəcəyik.
Oracle aşağıdakı minimum parametr qiymətlərini məsləhət görür:

fs.aio-max-nr = 1048576
fs.suid_dumpable = 1
fs.file-max = 6815744
kernel.shmall = 2097152
kernel.shmmax = 536870912
kernel.shmmni = 4096
kernel.sem = 250 32000 100 128
net.ipv4.ip_local_port_range = 9000 65500
net.core.rmem_default = 262144
net.core.rmem_max = 4194304
net.core.wmem_default = 262144
net.core.wmem_max = 1048586

Parametrlərin cari qiymətləri aşağıdakı komanda ilə yoxlanıla bilər:

/sbin/sysctl -a | grep <parametr-adı>

Aşağıdakı sətirləri  “/etc/sysctl.conf” faylına əlavə edirik və ya bəzi orada olan parametrlərin qiymətinə bu qiymətlərdən uyğun olanını yazırıq.

fs.suid_dumpable = 1
fs.aio-max-nr = 1048576
fs.file-max = 6815744
kernel.shmall = 2097152
kernel.shmmax = 536870912
kernel.shmmni = 4096
# semaphores: semmsl, semmns, semopm, semmni
kernel.sem = 250 32000 100 128
net.ipv4.ip_local_port_range = 9000 65500
net.core.rmem_default=4194304
net.core.rmem_max=4194304
net.core.wmem_default=262144
net.core.wmem_max=1048586

Cari kernel parametrlərini dəyişmək üçün aşağıdakı komandanı icra edirik

/sbin/sysctl -p

Aşağıdakı sətirləri  “/etc/security/limits.conf” faylına əlavə edirik.

oracle              soft    nproc   2047
oracle              hard    nproc   16384
oracle              soft    nofile  4096
oracle              hard    nofile  65536
oracle              soft    stack   10240

Aşağıdakı paketləri Oracle Enterprice Linux diskindən quraşdırırıq

cd /media/OL6.4\ x86_64\ Disc\ 1\ 20130225/Server/Packages/
rpm -Uvh binutils-2*x86_64*
rpm -Uvh glibc-2*x86_64* nss-softokn-freebl-3*x86_64*
rpm -Uvh glibc-2*i686* nss-softokn-freebl-3*i686*
rpm -Uvh compat-libstdc++-33*x86_64*
rpm -Uvh glibc-common-2*x86_64*
rpm -Uvh glibc-devel-2*x86_64*
rpm -Uvh glibc-devel-2*i686*
rpm -Uvh glibc-headers-2*x86_64*
rpm -Uvh elfutils-libelf-0*x86_64*
rpm -Uvh elfutils-libelf-devel-0*x86_64*
size: 13px; line-height: 19px;">rpm -Uvh gcc-4*x86_64*
rpm -Uvh gcc-c++-4*x86_64*
rpm -Uvh ksh-*x86_64*
rpm -Uvh libaio-0*x86_64*
rpm -Uvh libaio-devel-0*x86_64*
rpm -Uvh libaio-0*i686*
rpm -Uvh libaio-devel-0*i686*
rpm -Uvh libgcc-4*x86_64*
rpm -Uvh libgcc-4*i686*
rpm -Uvh libstdc++-4*x86_64*
rpm -Uvh libstdc++-4*i686*
rpm -Uvh libstdc++-devel-4*x86_64*
rpm -Uvh make-3.81*x86_64*
rpm -Uvh numactl-devel-2*x86_64*
rpm -Uvh sysstat-9*x86_64*
rpm -Uvh compat-libstdc++-33*i686*/p>
rpm -Uvh compat-libcap*
cd /
eject


Yeni qrup və istifadəçilər yaradırıq

groupadd -g 501 oinstall
groupadd -g 502 dba
groupadd -g 503 oper
groupadd -g 504 asmadmin
groupadd -g 506 asmdba
groupadd -g 505 asmoper
useradd -u 502 -g oinstall -G dba,asmdba,oper oracle

“oracle” userinə şifrə təyin edirik.

passwd oracle

“/etc/selinux/config”  faylını redaktə edərək Secure Linux -u aşağaıdakı kimi permissive olaraq təyin edirik  .

SELINUX=permissive

BU dəyişikliklər bitdikdən sonra serveri yenidən başladırıq(restart).Əgər Firewall işləyirsə onu aşağıdakı qaydada dayandırırıq.

Capture
Capture
Oracle program təminatının yerləşəcəyi direktoriyanı yaradırıq və ona uyğun icazələri veririk:
mkdir -p /u01/app/oracle/product/11.2/db_1
chown -R oracle:oinstall /u01</pre>
chmod -R 775 /u01

oracle user ilə sistemə daxil oluruq və aşağıdakı sətirləri  “.bash_profile”  faylına əlavə edirik.

TMP=/tmp; export TMP
TMPDIR=$TMP; export TMPDIR
ORACLE_HOSTNAME=orcl.localdomain; export ORACLE_HOSTNAME
ORACLE_UNQNAME=DB11G; export ORACLE_UNQNAME
ORACLE_BASE=/u01/app/oracle; export ORACLE_BASE
ORACLE_HOME=$ORACLE_BASE/product/11.2/db_1; export ORACLE_HOME
ORACLE_SID=DB11G; export ORACLE_SID
PATH=/usr/sbin:$PATH; export PATH
PATH=$ORACLE_HOME/bin:$PATH; export PATH
LD_LIBRARY_PATH=$ORACLE_HOME/lib:/lib:/usr/lib; export LD_LIBRARY_PATH
CLASSPATH=$ORACLE_HOME/jlib:$ORACLE_HOME/rdbms/jlib; export CLASSPATH
Oracle-nin extract olunmuş faylının olduğu papka cd komandası ilə dazil olub, aşağıdakı sətri içra edirik ki, Oracle Universal İnstallaer işə düşsün:
./runInstaller
Və daha sonra Oracle-nin quraşdırlması aşağıdakı şəkillərdə gördüyünüz kimi davam edəcəkdir:
runinstaller
email
secur
4
5
6
7
8
9
10
11
12
13
14
15
16
Daha sonra aşağıdakı qaydada netca komandasını icra etməklə listener yaradırıq.
1
2
3
4
5
6
7
8
Listener ayradıqdan sonra DBCA-nın köməkliyi ilə bazanı yaradırıq.
17
18
19
20
21
22
23
24
25
26
27
28
29
30
31
32
33